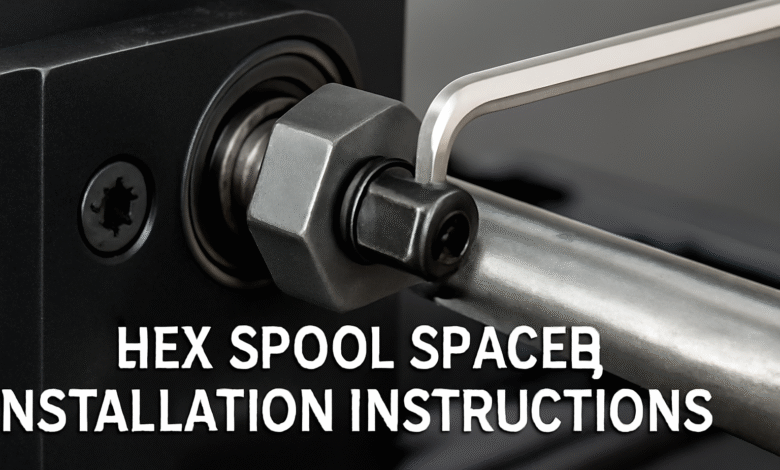
Hex Spool Spacer Installation Instructions: A Comprehensive Guide

When it comes to mechanical systems and 3D printers, precise alignment and proper spacing between components are crucial for efficient operation. One often overlooked component that plays a vital role in this process is the hex spool spacer. Whether you’re working with a 3D printer, a filament spool holder, or any other mechanical system requiring spacing, installing the hex spool spacer correctly can make all the difference in ensuring smooth functionality and longevity of your equipment. This guide will walk you through the installation instructions for a hex spool spacer, providing detailed steps, tips, and best practices to make the process as seamless as possible.
Understanding Hex Spool Spacers
Before diving into the installation process, it’s important to understand what a hex spool spacer is and why it’s necessary. A hex spool spacer is a small yet critical component that maintains an optimal distance between two parts. Its hexagonal shape ensures a secure and tight fit in the mechanical system. These spacers are commonly used in applications such as 3D printing, where the spool of filament needs to rotate freely without friction or misalignment. By maintaining the correct distance between the spool and the mounting system, the hex spool spacer helps prevent tangling, skipping, or uneven feeding of filament. In other applications, the hex spool spacer may serve as a distance regulator between rotating parts, helping to reduce wear and tear on the system.
Now that we understand the purpose of the hex spool spacer, let’s look at the step-by-step installation instructions.
Step 1: Preparation Before Installation
Preparation is the first step to a successful installation. Before installing the hex spool spacer, make sure that the workspace is clean and well-organized. This will help you avoid losing small components and keep your tools readily available. Ensure that the area where you’ll be working is free from dust, debris, or any items that could interfere with the process.
Additionally, gather all the tools and materials you’ll need for the installation. These typically include:
-
Hex spool spacer (the correct size for your application)
-
Hex wrenches or Allen keys (the appropriate size for the screws or bolts)
-
Screwdrivers (if required by your system)
-
Lubricant (optional but recommended for smooth operation)
-
Safety gloves (optional but can provide extra protection for your hands)
-
Clean cloth (to wipe off excess lubricant or dirt)
Step 2: Power Off and Unplug the System
If you are working with an electrical system, such as a 3D printer, always ensure that the system is powered off and unplugged before beginning the installation. This will help prevent any accidental electrical shocks or damages. Safety should always be the top priority when working with any mechanical or electrical systems.
Step 3: Locate the Correct Placement for the Hex Spool Spacer
Once you have your workspace prepared, the next step is to locate the area where the hex spool spacer needs to be installed. This is typically between two parts that need spacing, such as between the spool and the spool holder or between rotating components. Understanding the specific location for the hex spool spacer is critical for ensuring proper alignment and functionality.
The hex spool spacer is designed to fit into a corresponding hex-shaped slot, which will allow it to securely lock into place. Take note of the orientation of the spacer and the surrounding components to ensure that the spacer is placed correctly.
Step 4: Inserting the Hex Spool Spacer
With the placement area identified, take the hex spool spacer and carefully slide it into its designated slot. The hexagonal design should allow the spacer to fit snugly, ensuring it remains in place during use. If you encounter resistance during insertion, gently check for any debris or dirt that may be obstructing the fit. Cleaning the area before insertion can help ensure a smooth fit.
The spacer should sit flush against the surrounding components, creating a consistent gap between them. Ensure that there are no visible gaps or misalignments before proceeding.
Step 5: Securing the Spacer in Place
Once the hex spool spacer is inserted, it’s time to secure it in place. Use the appropriate hex wrench or Allen key to tighten any screws, bolts, or fasteners that are designed to hold the spacer in position. Be cautious not to overtighten the fasteners, as this can damage the spacer or surrounding components. Tighten the bolts just enough to ensure the spacer is held firmly in place, preventing any movement during operation.
If the system you’re working with has adjustable tension, such as a filament holder on a 3D printer, ensure that the hex spool spacer is set to the desired tension. This adjustment will ensure smooth rotation or operation of the parts involved.
Step 6: Checking Alignment and Functionality
After securing the spacer, it’s important to check the alignment of the components. The system should operate smoothly without any obstruction or misalignment. For 3D printers, manually rotate the spool holder or run a test print to make sure the filament feeds properly. For other mechanical systems, rotate the moving parts by hand or run the system through a few cycles to ensure everything is functioning correctly.
If you notice any resistance, noise, or misalignment, double-check the installation to ensure the hex spool spacer is in place and correctly aligned. Sometimes even a slight misalignment can affect the performance of the system.
Step 7: Final Adjustments and Testing
Once the system is functioning correctly, make any final adjustments to the spacer or surrounding components if necessary. Ensure that everything is secure, but do not overtighten any screws or bolts, as this can cause damage over time. It’s also important to test the system again after any adjustments to confirm that the hex spool spacer is providing the necessary spacing and that all parts are functioning optimally.
If lubricant was applied during the installation process, take a clean cloth and wipe off any excess to prevent build-up, which could affect performance. A clean and well-maintained system will work more efficiently and have a longer lifespan.
Step 8: Routine Maintenance and Inspection
Installing a hex spool spacer is just one part of keeping your mechanical system or 3D printer in top shape. Regular maintenance is key to ensuring long-term functionality. Periodically check the spacer to ensure it hasn’t worn down or become misaligned. If you notice any issues, address them as soon as possible to avoid causing further damage to the system.
For 3D printers, inspect the filament spool holder regularly to ensure that the spool rotates freely without tangling or skipping. For other systems, check the moving parts for wear and tear, especially if they experience frequent motion or load.
Read also: Sửa Bơm Hơi ABS Cho Lexus RX400: A Comprehensive Guide to Repairing and Maintaining Your Vehicle’s ABS System
Conclusion
Proper installation of a hex spool spacer can significantly improve the efficiency and longevity of your system. By following the step-by-step instructions outlined above, you can ensure that the hex spool spacer is securely installed, aligned, and functioning as intended. Whether you are working with a 3D printer, a filament holder, or another mechanical system, taking the time to correctly install and maintain the hex spool spacer will help you avoid unnecessary wear and keep your system running smoothly.
In addition to the installation instructions, remember that regular maintenance and periodic inspection of your equipment are essential for optimal performance. A well-maintained system not only operates more efficiently but also reduces the likelihood of costly repairs or replacements down the line. So, follow these hex spool spacer installation instructions carefully and enjoy the benefits of a perfectly aligned and functional machine.


